If you are citizen of an European Union member nation, you may not use this service unless you are at least 16 years old.
You already know Dokkio is an AI-powered assistant to organize & manage your digital files & messages. Very soon, Dokkio will support Outlook as well as One Drive. Check it out today!
These skills, along with cooking and first aid, will come in handy during Camporee events, and at many other times throughout your life.
Lashing
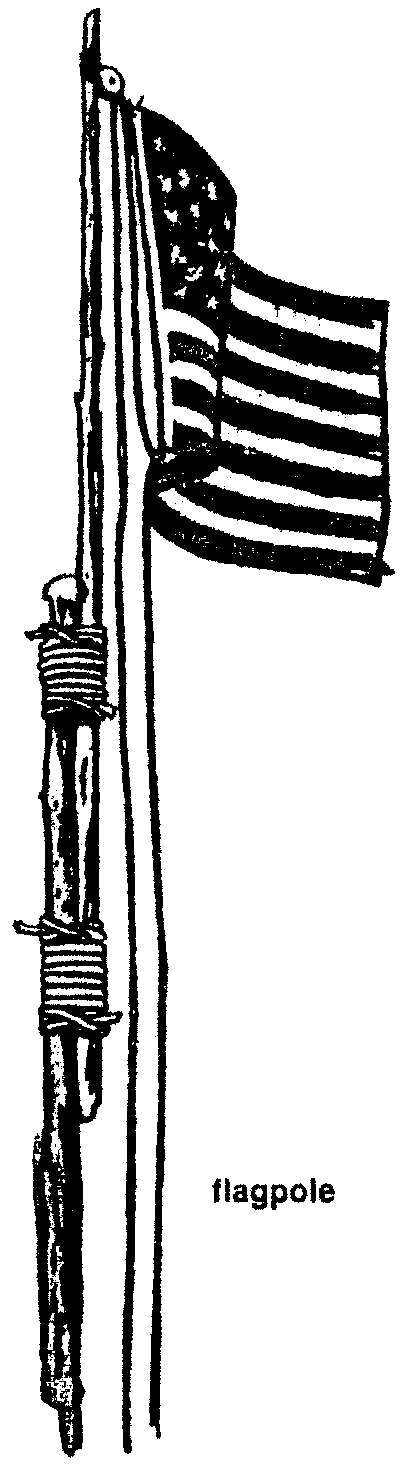
Used by Native Americans and Pioneers, lashing is the term for fastening two or more sticks or poles together using binder twine or rope rather than nails. Lashing is a fun and easy way to construct shelving, racks, flagpoles, hooks, and many useful objects in your campsite without harming trees. It is more suited to established campsites, and is often prohibited in the backcountry. It is always a good idea to ask before building a structure. Use only downed wood and leave no trace behind when you break camp. In your campsite, you would use downed wood to construct a structure, but for practicing your skills at home you can use broomsticks, dowels, bamboo poles, PVC pipe, or when available, pruned tree limbs. You will also need a spool of binder twine (or string, cord, rope, etc.) and your pocketknife to cut it. For your campsite, useful items might include a pruning saw (to cut wood to length) and a hammer or large rock for pounding sticks into the ground. Almost all lashing begins with a clove hitch and ends with a square knot, and should be neat and attractive with the twine lying side by side, not overlapping. Knowledge of basic lashing techniques will enable you to build many types of structures.
Remember, all lashing projects, while fun to make and difficult to part with, must be completely taken down and wood scattered when leaving your campsite. Remember to pick up all twine and dispose of correctly.
How many kinds of Lashing can you find in this project?.
Your lashing projects will be much neater, quicker, and easier if you start with your twine in a tidy ball or skein. An easy way to make a skein that will fit your hands and unwind without tangles is to wind your twine across the palm of your hand, around your outstretched thumb and little finger.
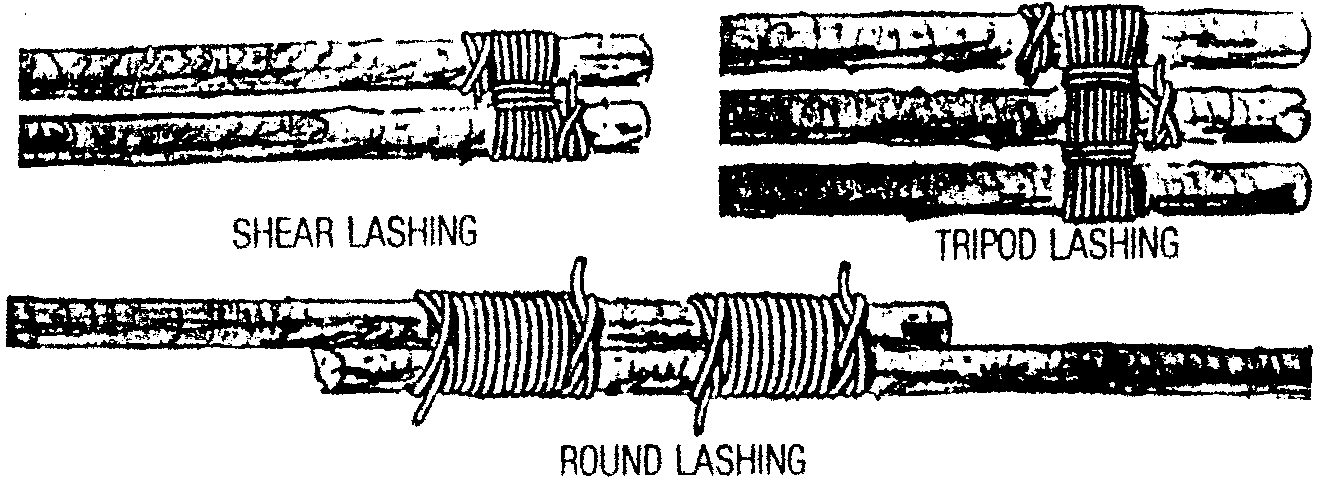
Round Lashing is used when you need to make a pole longer.
Place two poles so the ends overlap (remember, you are trying to make a longer pole).
Place a clove hitch around both poles at one end where they overlap.
Begin winding the twine around both poles until you reach the other end where they overlap.
If you’ve done this tightly enough, you will not be able to frap this type of lashing.
Finish the wrapping with a clove hitch.
For extra strength, overlap the poles a longer distance and have two sets of round lashing where each of the ends overlap, rather than one continuous lashing.
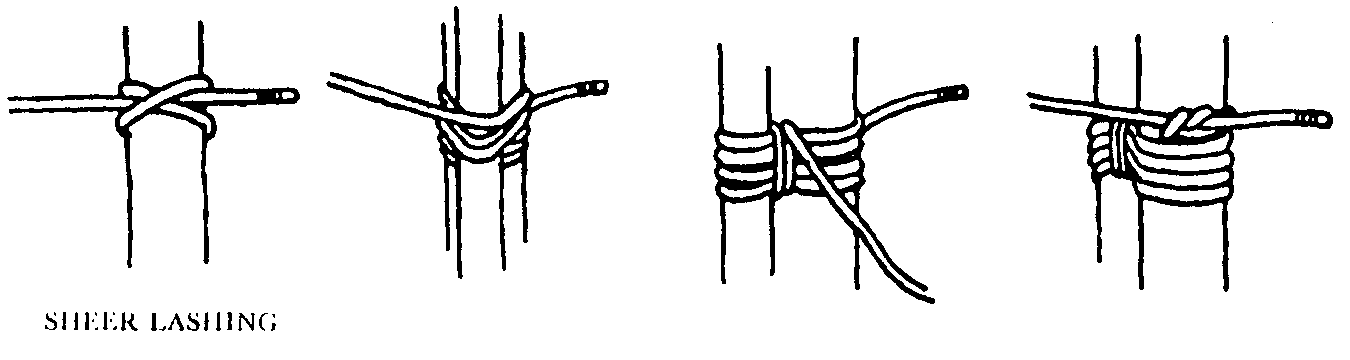
Shear Lashing adds frapping between the poles. With tight frapping, it can join two poles like round lashing. Looser frapping is a great way to create an A-frame with two poles. It is lashed very much like round lashing above, but not as tightly.
Lay two poles side by side and clove hitch around one pole. Make four or more wraps around both poles, somewhat loosely. Frap three times between the poles, tie a square knot with the original clove hitch end, and raise as an A-frame.
Continuous Lashing is probably the most fun of all the lashing techniques. It requires two to three people to complete successfully. It is useful in creating shelves, dishwashing stations, tables, and many other wonderful structures in your campsite.
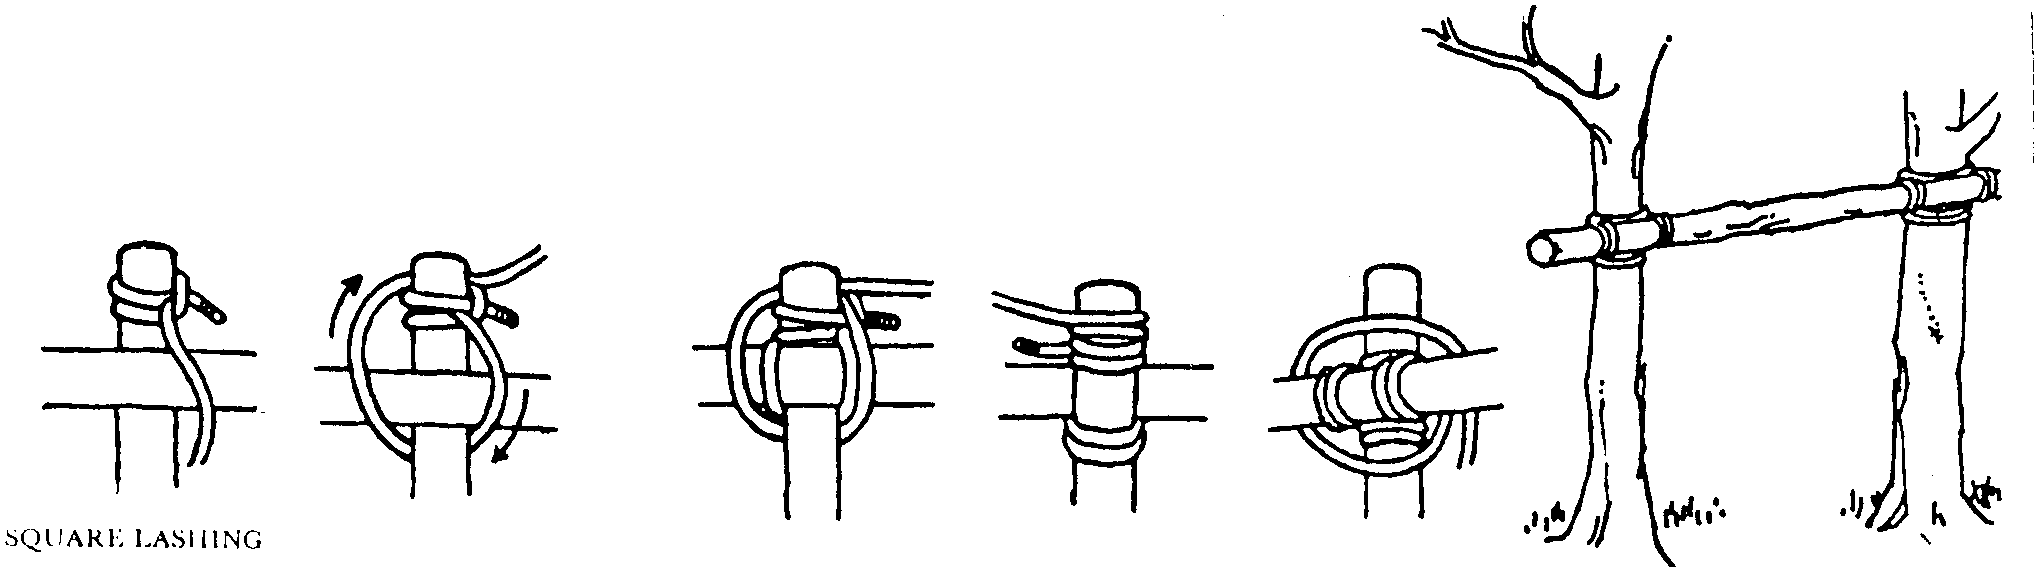
If you want to make a shelf or dishwashing station, you begin by square lashing two long poles between two trees (if you don’t have trees, you will need to make legs for the ends and square lash the poles to the legs. Now begins the continuous part. You will need lots of small sticks (notching isn’t required) to create your shelf on the two long poles. If you have three people working, two will wrap twine and one will feed the sticks between wraps. Measure twine that is about 4-5 times the length of your finished structure for each person wrapping. Find the center and wrap the twine around each hand. Using this center, tie a clove hitch around the cross pole for each side. The third person now lays a stick between the two poles. Working together, each person wrapping goes over the pole (one hand inside the poles, one outside), down under the pole, making a cross (switch bundles to opposite hands while underneath). Each person continues working in unison, bringing the twine up, over another stick, down, and cross, until your shelf is complete. End the lashing with a square knot. The design possibilities for this type of lashing are endless.
How many kinds of Lashing can you find in this project?.
 Used by Native Americans and Pioneers, lashing is the term for fastening two or more sticks or poles together using binder twine or rope rather than nails.
 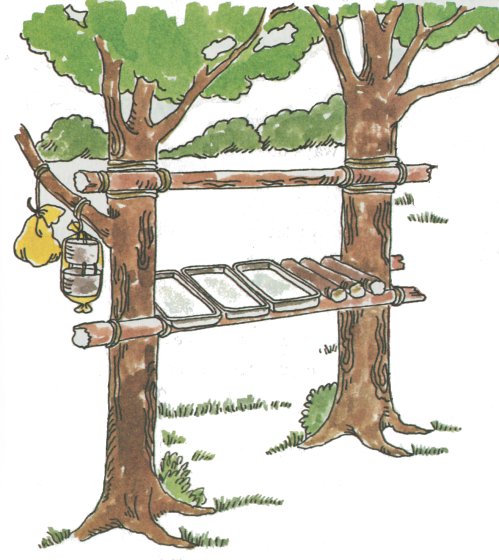 Lashing is a fun and easy way to construct shelving, racks, flagpoles, hooks, and many useful objects in your campsite without harming trees. It is more suited to established campsites, and is often prohibited in the backcountry. It is always a good idea to ask before building a structure. Use only downed wood and leave no trace behind when you break camp. In your campsite, you would use downed wood to construct a structure, but for practicing your skills at home you can use broomsticks, dowels, bamboo poles, PVC pipe, or when available, pruned tree limbs. You will also need a spool of binder twine
 (or string, cord, rope, etc.) and your pocketknife to cut it. For your campsite, useful items might include a pruning saw (to cut wood to length) and a hammer or large rock for pounding sticks into the ground. Almost all lashing begins with a clove hitch and ends with a square knot, and should be neat and attractive with the twine lying side by side, not overlapping. Knowledge of basic lashing techniques will enable you to build many types of structures.
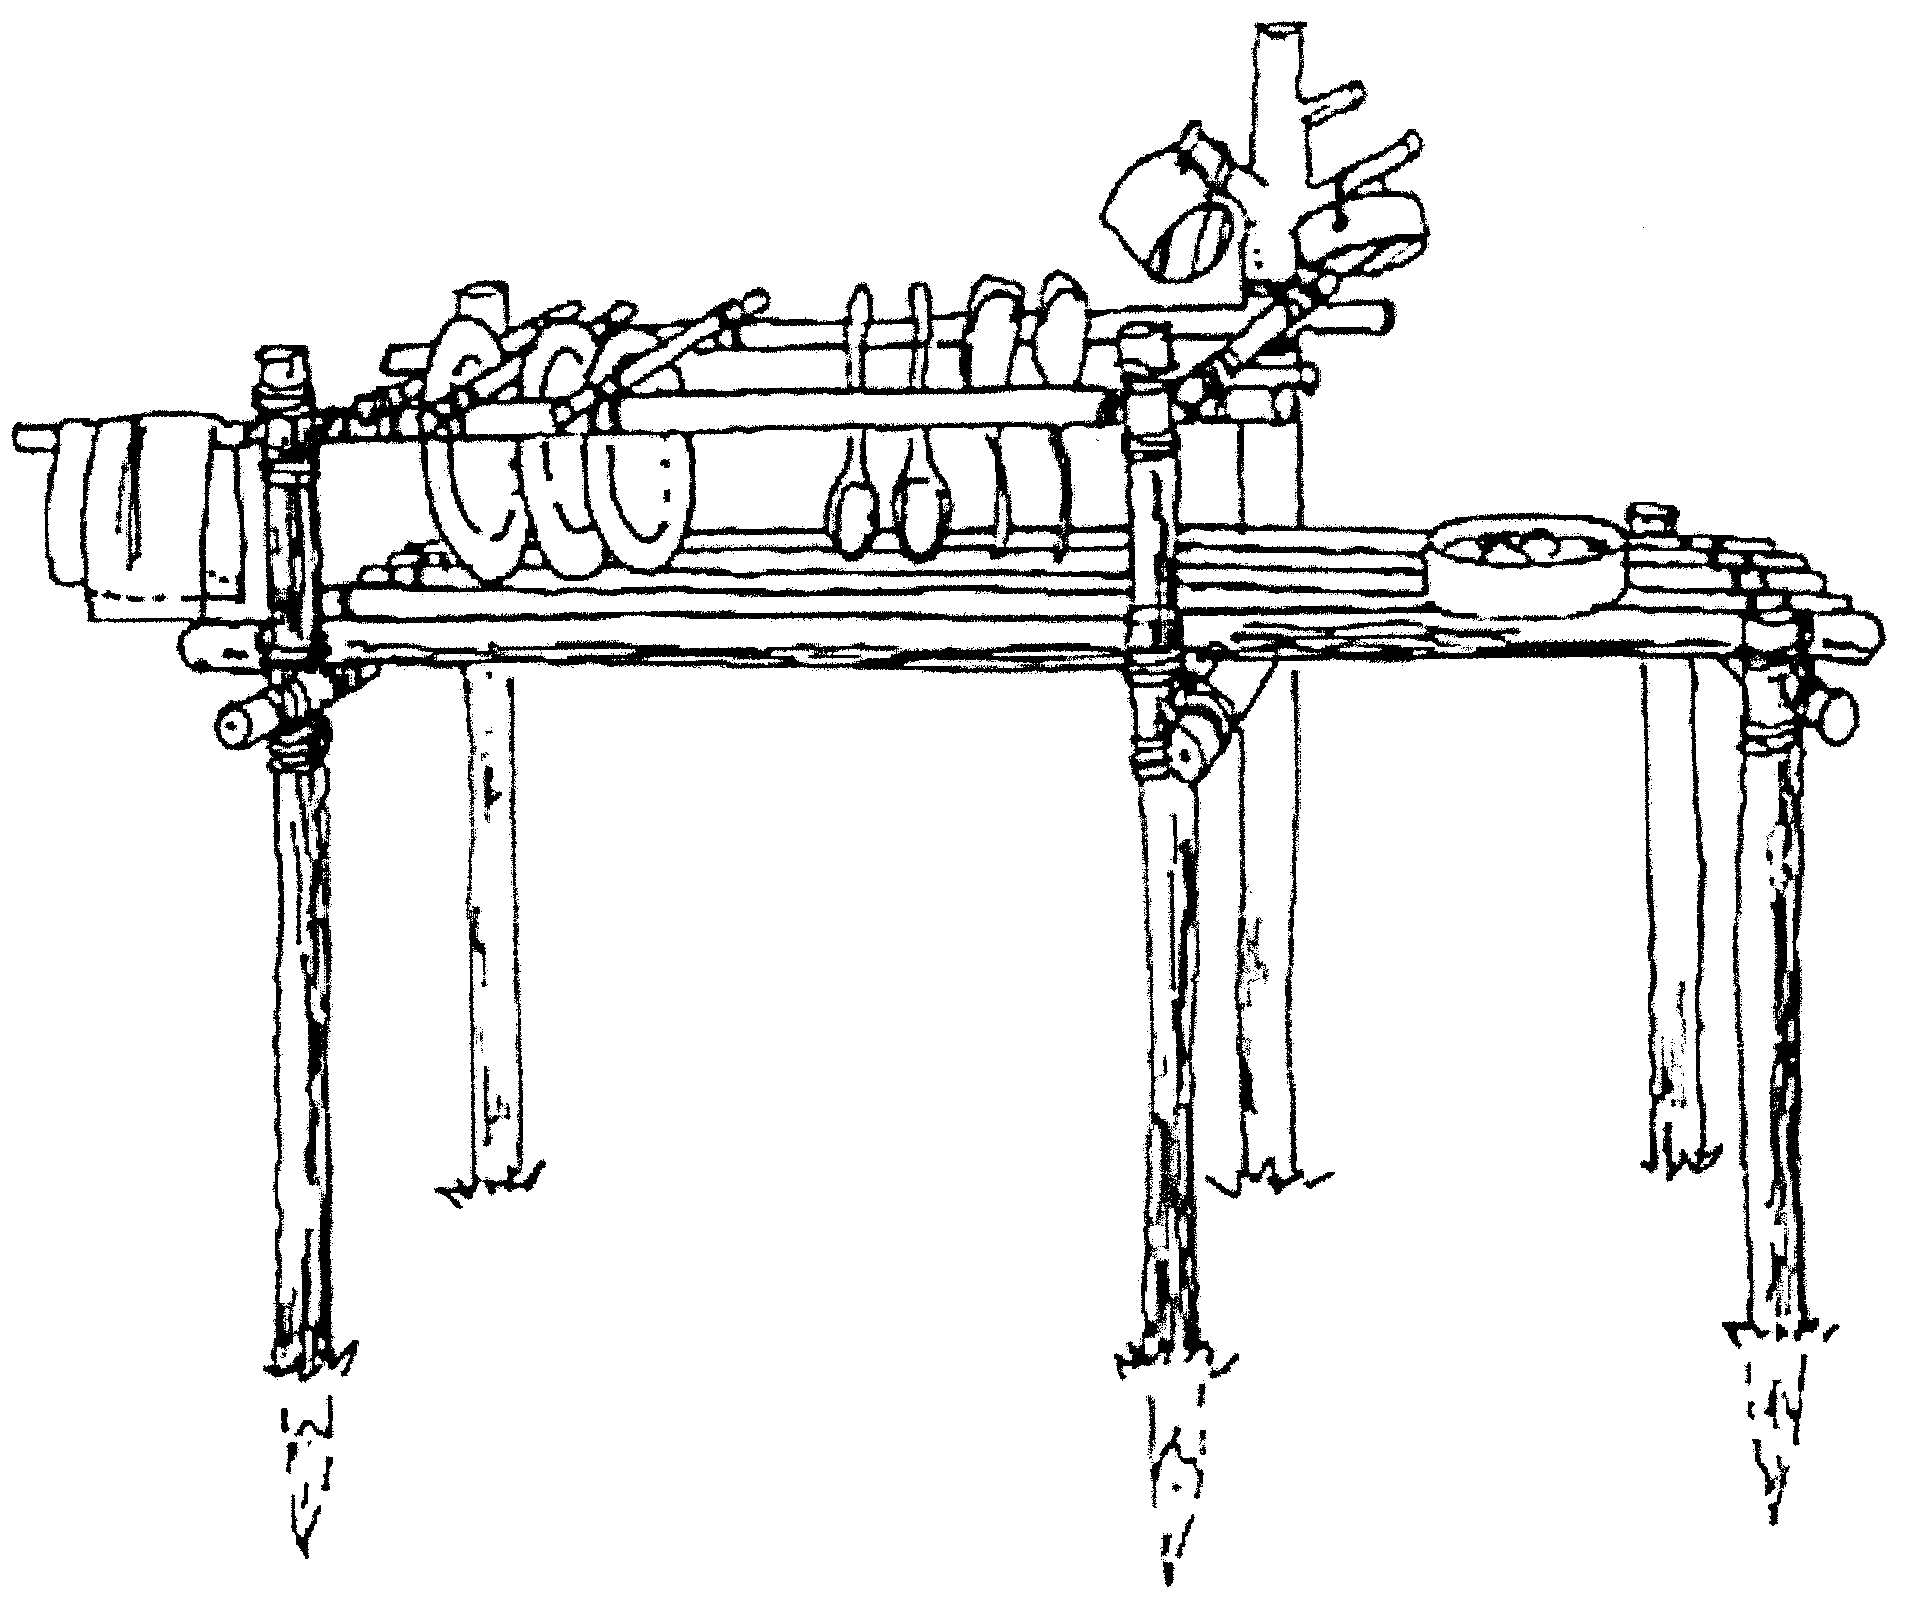


Comments (0)
You don't have permission to comment on this page.